Sentry + Vue 搭建客户端
项目使用 Vue 3.0 + vite。使用 install 插入 sentrxy。
Sentry 创建新项目
在服务端上新建 Vue项目。
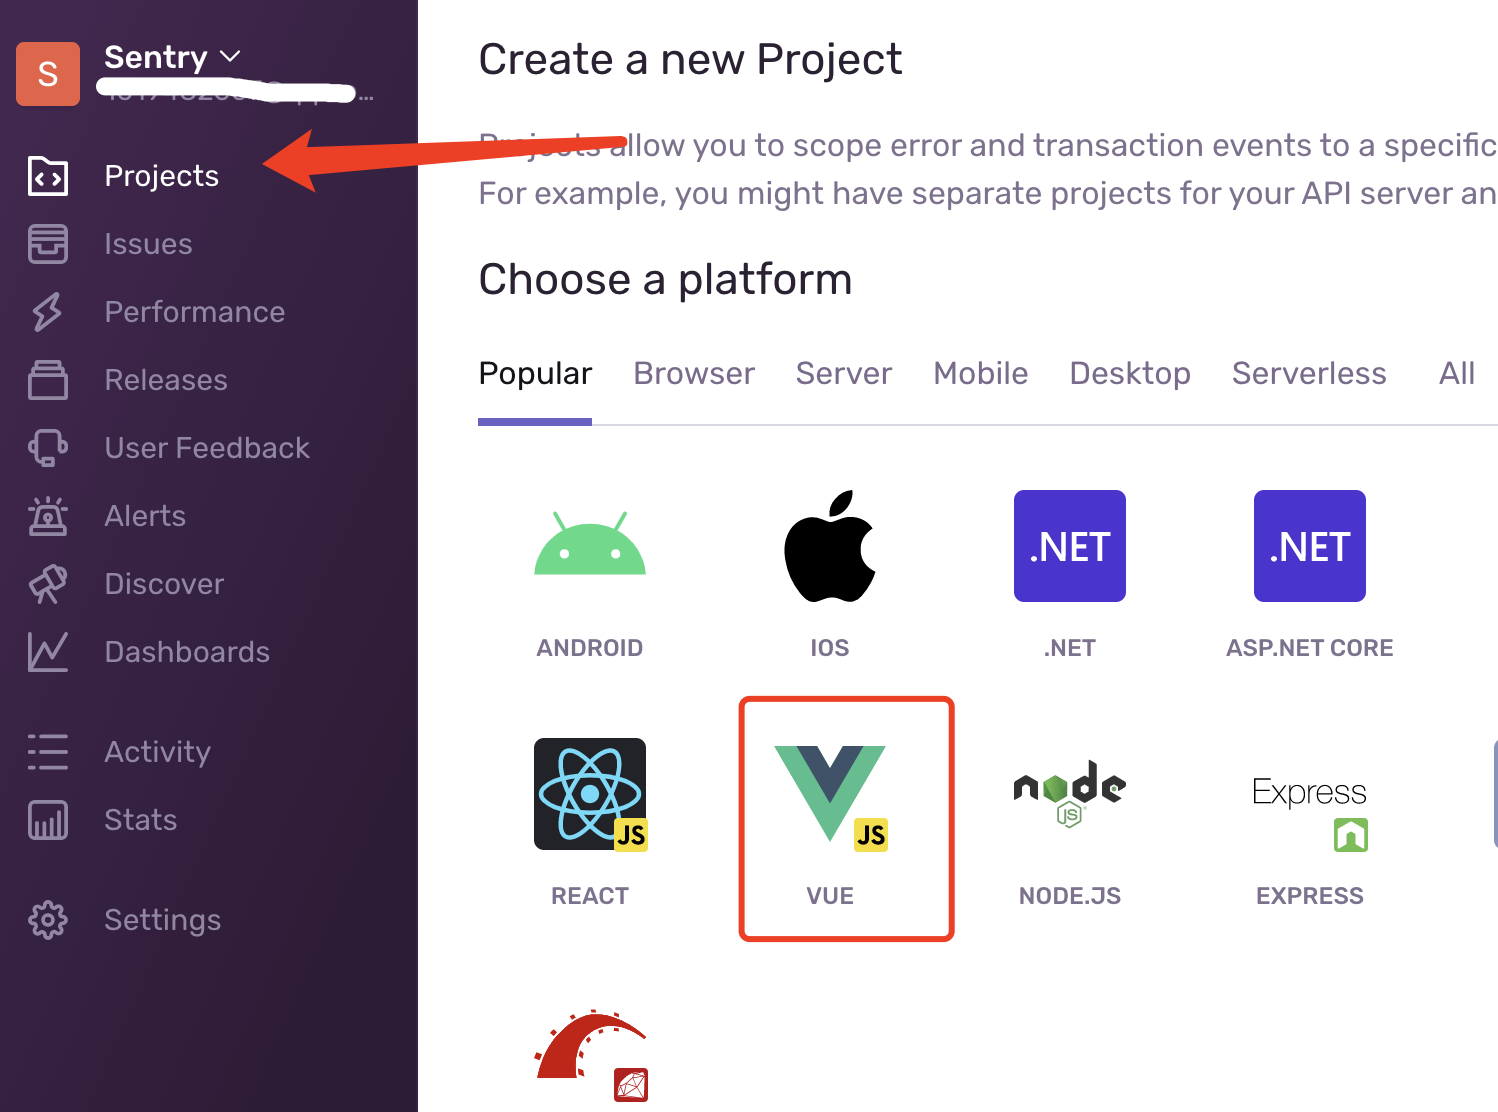
创建之后可以进入项目,按照提示进行配置。
也可以根据下面的项目项目配置。
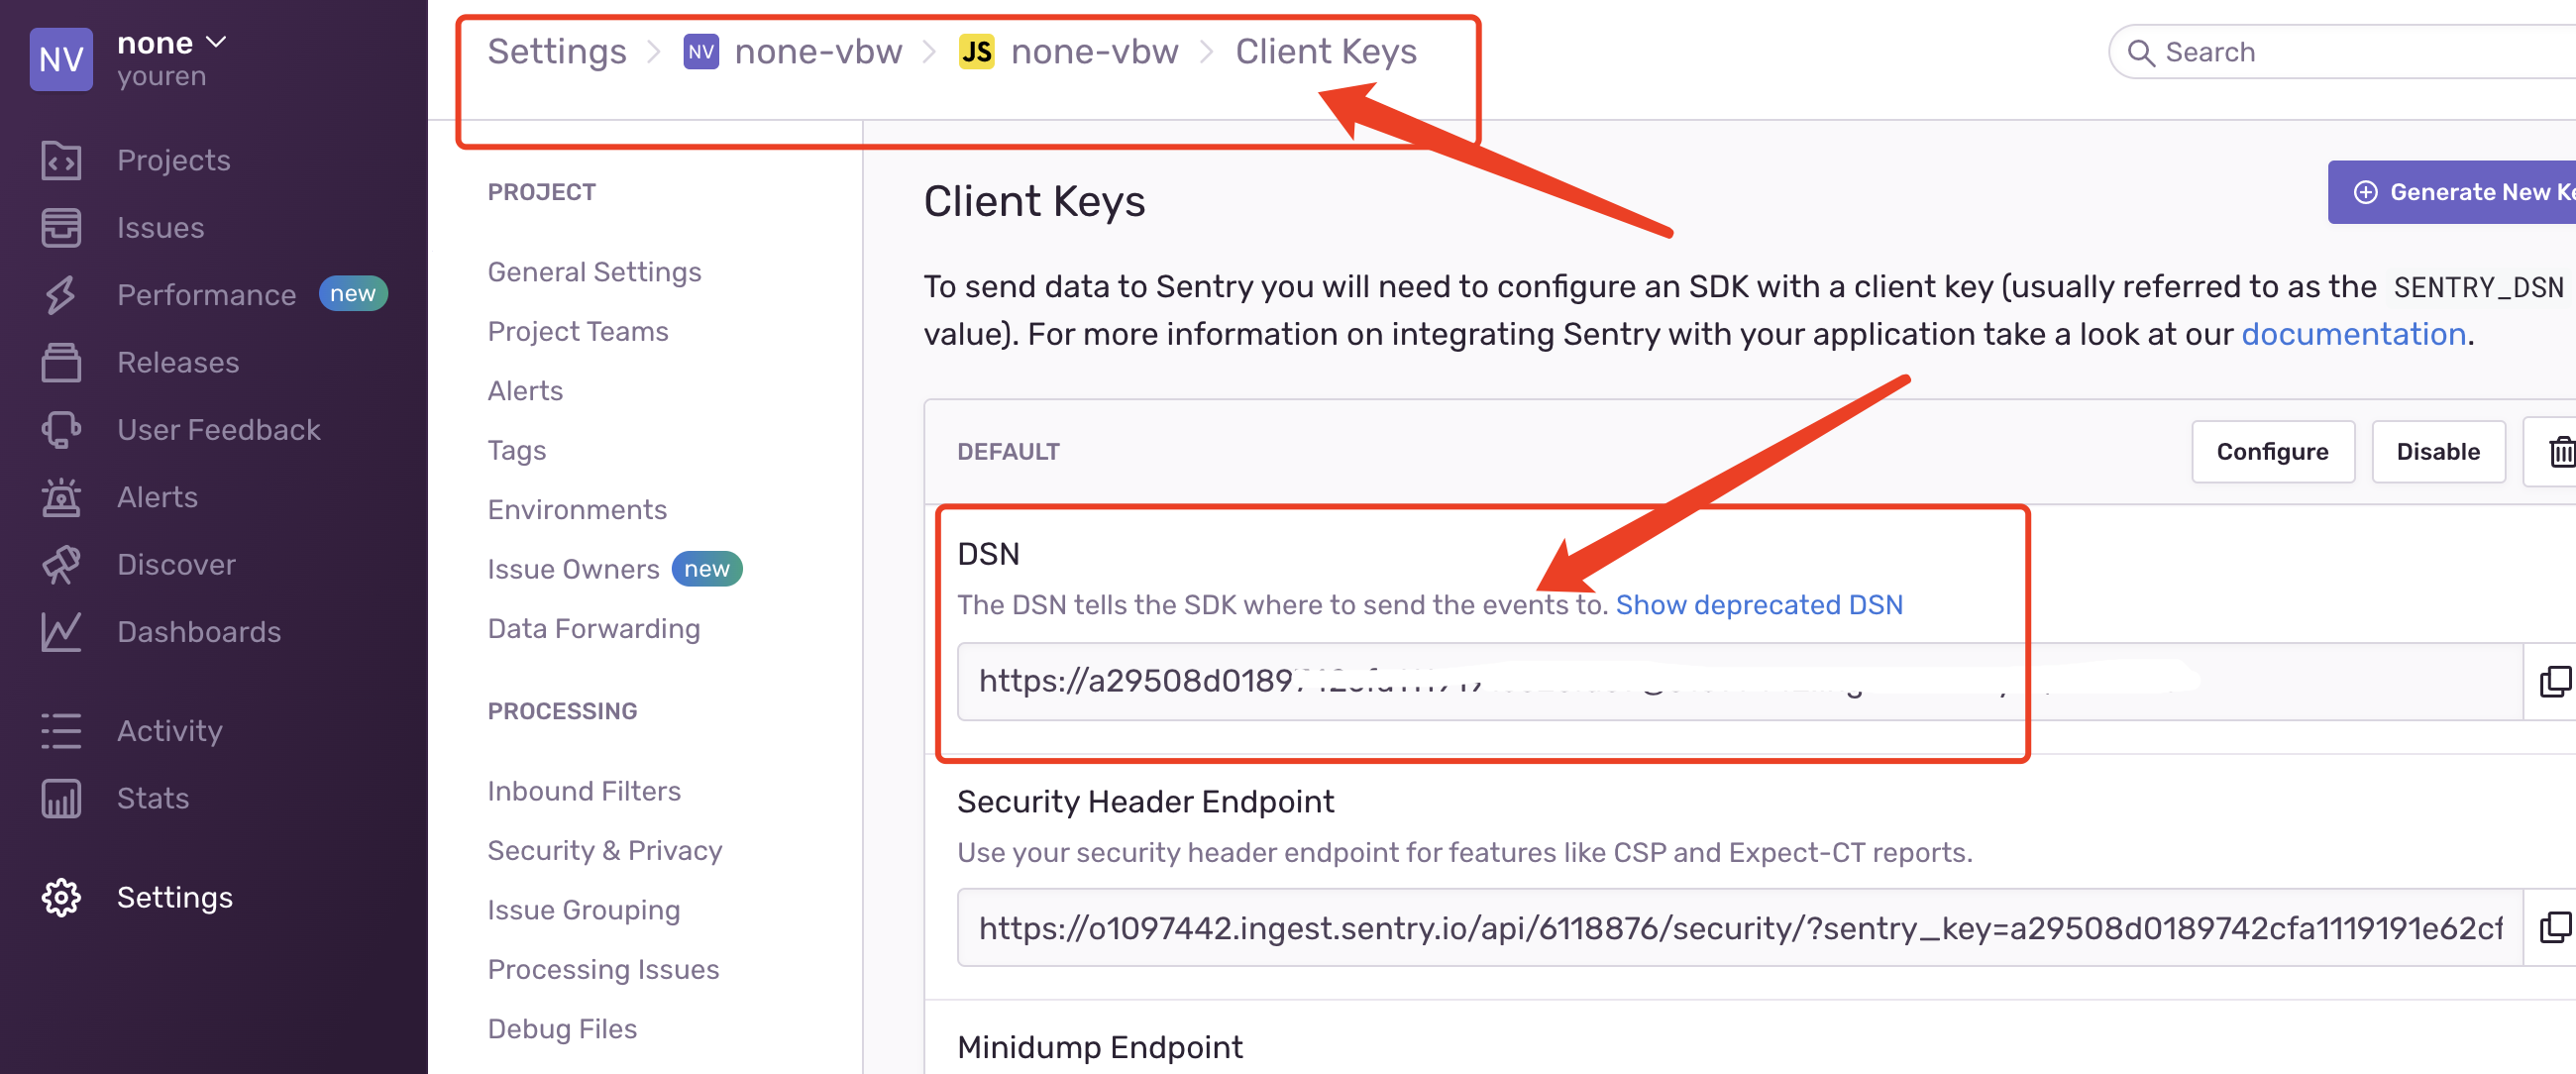
Sentry 信息配置
获取服务端项目 DSN
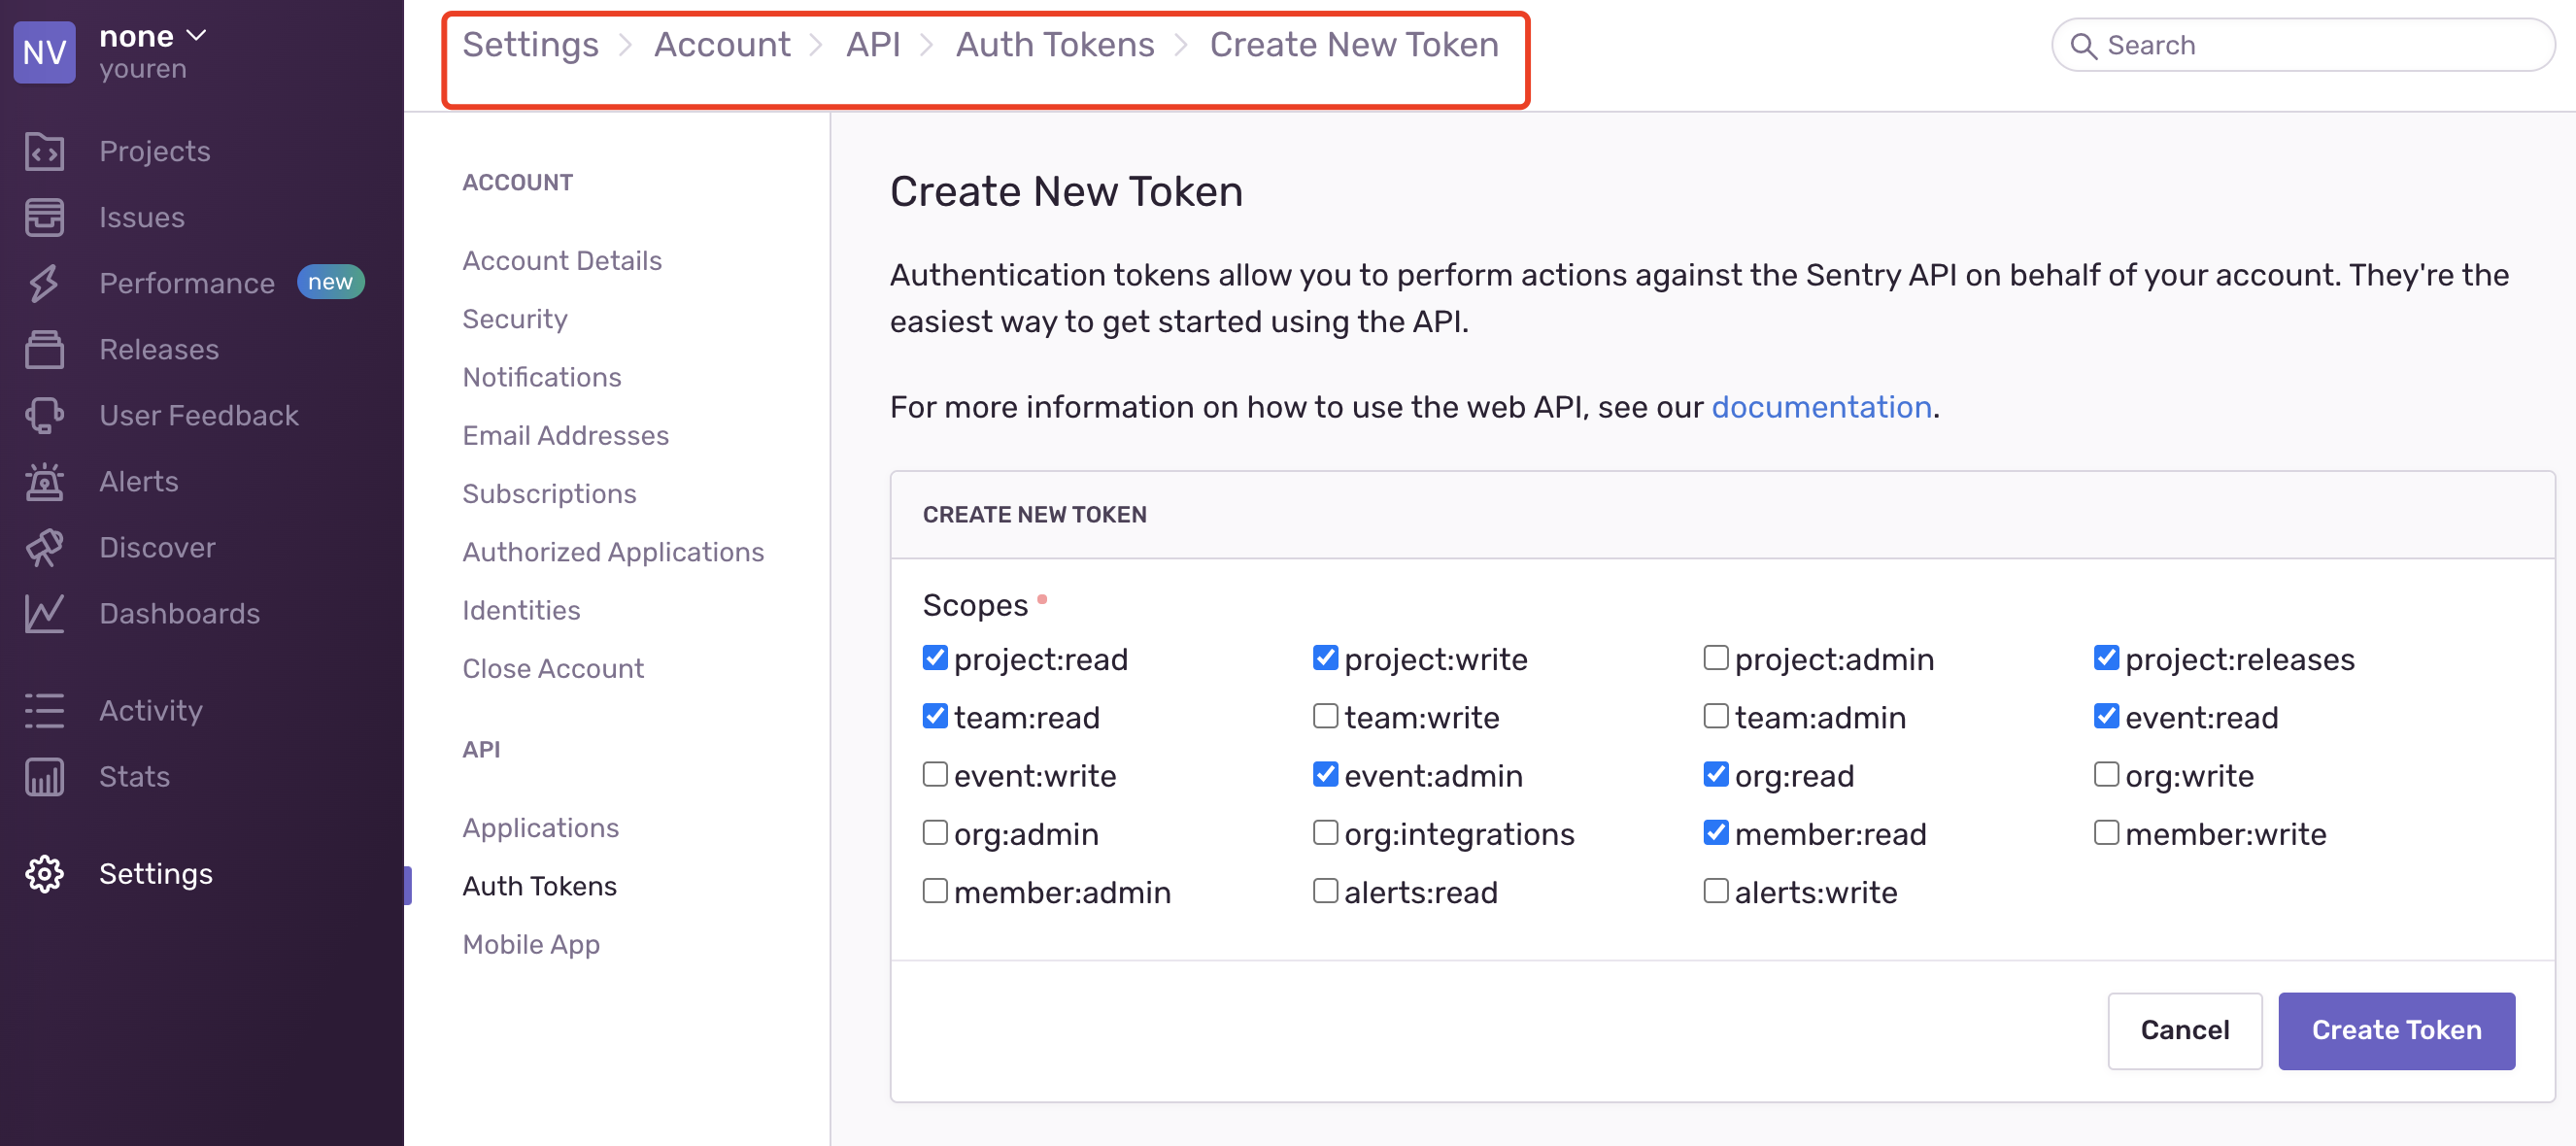
生成服务端 AuthToken
项目配置
Install
yarn add @sentry/integrations @sentry/tracing @sentry/vue

yarn add @sentry/cli -D
@sentry/integrations: JavaScript SDK 集成,增强 JS SDK 的可插拔集成。
@sentry/tracing: 包含@sentry/hub对启用 Sentry AM 相关功能的扩展,为 Browser 和 Node 提供集成整合。
@sentry/vue: @sentry/browser 拓展,增加与 Vue 相关的功能。
@sentry/cli: Sentry 命令行客户端。
项目文件
├── .sentryclirc
├── uploadSourceMap.sh
├── vite.config.ts
├── src
│   └── main.ts
│   └── axios.ts
.sentryclirc
[auth]
token=`${你的 AuthToken}`
[defaults]
org=`${你的组织名}`
project=`${你的项目名}`
uploadSourceMap.sh
#!/usr/bin/env bash

GIT_VERSION=`git rev-parse --short HEAD`

VERSION="$TAG_NAME-$GIT_VERSION"

echo sentry VERSION $VERSION

sentry-cli releases files $VERSION upload-sourcemaps ./dist/assets --url-prefix '~/assets' list --validate

cd ./dist/assets

rm -f *.map *.map.gz
VERSION="$TAG_NAME-$GIT_VERSION" 配置是防止不同环境生成时,个别环境会使用同一个分支 commit hash。如果没有这类顾虑的可以使用 commit hash作为 VERSION。
vite.config.ts
import { execSync } from 'child_process'

function commitHash() {
  return execSync('git rev-parse --short HEAD', { encoding: 'utf8' }).trim()
}

export default defineConfig({
   build: {
    sourcemap: true,
   },
   define: {
      VITE_CONF: {
        VITE_APP_VERSION: process.env.TAG_NAME + '-' + commitHash(), // 写入VERSION
        VITE_APP_SENTRY_DSN: `${你的 DSN}`
      }
    }
})
main.ts
import { createApp } from 'vue'
import router from '@/router/index'
import * as Sentry from '@sentry/vue'
import { CaptureConsole as CaptureConsoleIntegration } from '@sentry/integrations'
import { Integrations } from '@sentry/tracing'

const app = createApp(App).use(router).use(store, key).use(Antd)
Sentry.init({
  Vue: app,
  release: VITE_CONF.VITE_APP_VERSION,
  dsn: VITE_CONF.VITE_APP_SENTRY_DSN,
  environment: 'test',
  logErrors: true,
  integrations: [
    new Integrations.BrowserTracing({
      routingInstrumentation: Sentry.vueRouterInstrumentation(router),
      tracingOrigins: ['localhost', 'my-site-url.com', /^\//]
    }),
    new CaptureConsoleIntegration({
      levels: ['error', 'info']
    })
  ],
  tracesSampleRate: 1.0
})
axios.ts
import * as Sentry from '@sentry/vue'

cosnt errorHandler = (response) => {
  ... ...
  Sentry.setTag('api', response.config.url)
  Sentry.setExtra('data', {
    request: JSON.stringify(response.config.data),
    response: JSON.stringify(response.data),
    headers: response.config.headers
  })
  if (type === 'error') {
    Sentry.captureException(new Error(`API-${response.config.url}-${code}`))
  }
  if (type === 'info') {
    console.info(`Device-${response.config.url}`)
  }
}
sourceMap 上传方式
这里 sentry 上传 sourceMap 方式有三种:
- sentry-cli 插件(推荐)
- sentry API
- sertry webpack 打包时进行上传:
@sentry/webpack-plugin/webpack-sentry-plugin
sentry-cli 如何上传
查看 uploadSourceMap.sh